WHITE OAK REFINISHING
We refinished the existing 4-inch white oak on the downstairs level and blended DuraSeal Provincial with Dark Walnut to coordinate with the home's upstairs flooring. The finish was protected with three coats of CeramicStar.
Downstairs refinishing and bathroom installation.
The downstairs white oak was sanded and restored.
A DuraSeal blend selected to coordinate with the upstairs.
A durable finished surface with a clean, even appearance.

ONE HOME. TWO FLOORING SCOPES.
The main scope was refinishing the existing downstairs 4-inch white oak. We sanded away the previous orange tone, prepared stain samples, and blended Provincial with Dark Walnut so the downstairs would relate naturally to the already-finished upstairs.
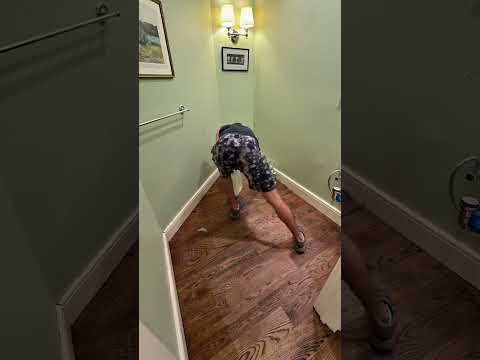
We also completed a smaller bathroom installation: demolition, new hardwood installation around the toilet piping, sanding, staining and finishing. The bathroom work is shown separately below.
THE WAYLAND TRANSFORMATION
These are matched areas from the project. The sanded views sit between the original floor and the completed stain and finish so you can see the work in sequence.
Foyer and Staircase Area
The heavy orange tone was removed, the existing white oak was sanded evenly, and the Provincial–Dark Walnut blend gave the downstairs a deeper brown that coordinates with the upper level.
Stair Hall and Entry
Additional views show the sanding detail beside the staircase and the finished color across the open entry. These images document the same downstairs refinishing scope from different positions.
Kitchen and Open Living Area
The kitchen angles show the original warm-orange appearance and the completed darker stain. Careful sanding and application kept the color consistent around the island, cabinets and open transitions.
SEE THE MAIN FLOOR IN MOTION
Downstairs White Oak Refinishing
The video shows the finished flooring through the connected downstairs spaces. It opens with one click and plays directly on this page.
EVALUATION TO NEW FINISHED HARDWOOD
As requested, the bathroom video comes first. The three photos then show the work in its correct order: we first sanded the existing floor to see its condition, removed it and exposed the subfloor, then installed new hardwood around the plumbing before staining and finishing it.
Bathroom Replacement Process
We sanded the old finish first to evaluate the existing flooring. After determining that replacement was the right approach, we removed the old floor, prepared the exposed subfloor, installed new hardwood around the toilet piping, and completed the work with stain and finish.
COMPLETED DOWNSTAIRS DETAILS
The remaining finished views show the consistent stain color through the entry, staircase, hallway and kitchen.
WHAT WENT INTO THE FINISH
Existing Floor
Four-inch white oak on the downstairs level was retained and professionally refinished.
Color Selection
DuraSeal Provincial and Dark Walnut were blended to coordinate with the existing upstairs tone.
Sample Approval
Stain samples allow the homeowner to review color on the actual wood before the full application.
Protection
Three coats of CeramicStar completed the main refinishing scope.
A DOWNSTAIRS THAT BELONGS WITH THE HOME
The new color removes the dated orange cast and creates a richer, calmer foundation across the first floor. The bathroom installation adds hardwood continuity in a smaller space while respecting the plumbing layout.
The finish was chosen to complement the upstairs—not to claim that both levels were refinished. Accolade Flooring completed the downstairs and bathroom scopes shown here.
WAYLAND PROJECT DETAILS
What stain was used?
A custom blend of DuraSeal Provincial and Dark Walnut was used on the downstairs white oak.
How many finish coats were applied?
Three coats of CeramicStar were applied to protect the refinished flooring.
Did Accolade Flooring refinish the upstairs?
No. The work shown here was completed downstairs. The color was selected to coordinate with the existing upstairs flooring.
Can hardwood be installed around bathroom plumbing?
Yes, when site conditions allow. Accurate cutting, subfloor preparation and proper clearances around the toilet piping are important. We inspect the area before confirming the scope.
PLANNING A FLOORING PROJECT?
Send us your location, approximate square footage and a few photos. We can help determine whether refinishing, repair or new installation makes the most sense.
REQUEST A FREE ESTIMATE